[Flash动画制作技巧]flash中影片剪辑的排列顺序控制和拖拽效果
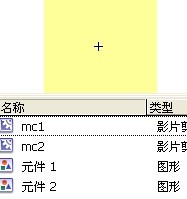
首先,打开falsh8,插入两个图形元件,一个方形,一个圆形。
其次,再建立两个影片剪辑,分别把图形元件拖进去。这样mc1是方形的影片剪辑,mc2是圆形的影片剪辑。
如下图所示:
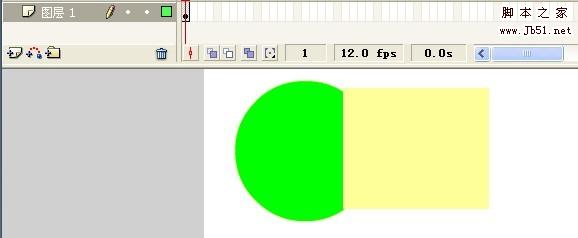
再次,把两个影片剪辑拖到同一帧上,这样的默认效果是一个在上,一个在下。
注意:拖进去的时候要给影片剪辑命名,点击影片剪辑,打开属性面板,如下图所示:
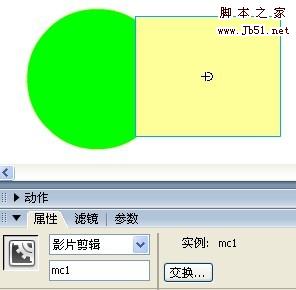
这样,给方形影片剪辑命名为mc1,给圆形影片剪辑命名为mc2。
下面就是写as代码了。
一、选择方形影片剪辑,打开其动作面板输入一些代码:
on(press){
this.swapDepths(1); //设置当前方形影片剪辑的深度为1
mc2.swapDepths(2); //设置圆形影片剪辑mc2的深度为2
this.startDrag(true); //用于拖拽
}
on(release){
this.stopDrag(); //用于拖拽
}
二、选择圆形影片剪辑,打开其动作面板输入一些代码:
on(press){
this.swapDepths(1); //设置当前圆形影片剪辑的深度为1
mc1.swapDepths(2); //设置方形影片剪辑mc1的深度为2
this.startDrag(true); //用于拖拽
}
on(release){
this.stopDrag(); //用于拖拽
}
大功告成!!!
推荐阅读:
![[动画制作] 武汉动画制作,专业动画制作公司!](https://www.huanghelou.cc/zb_users/upload/2023/10/202310131697165201491918.png)


 鄂公网安备: